Friday, July 14, 2006

PC - Solving Slowness Woes

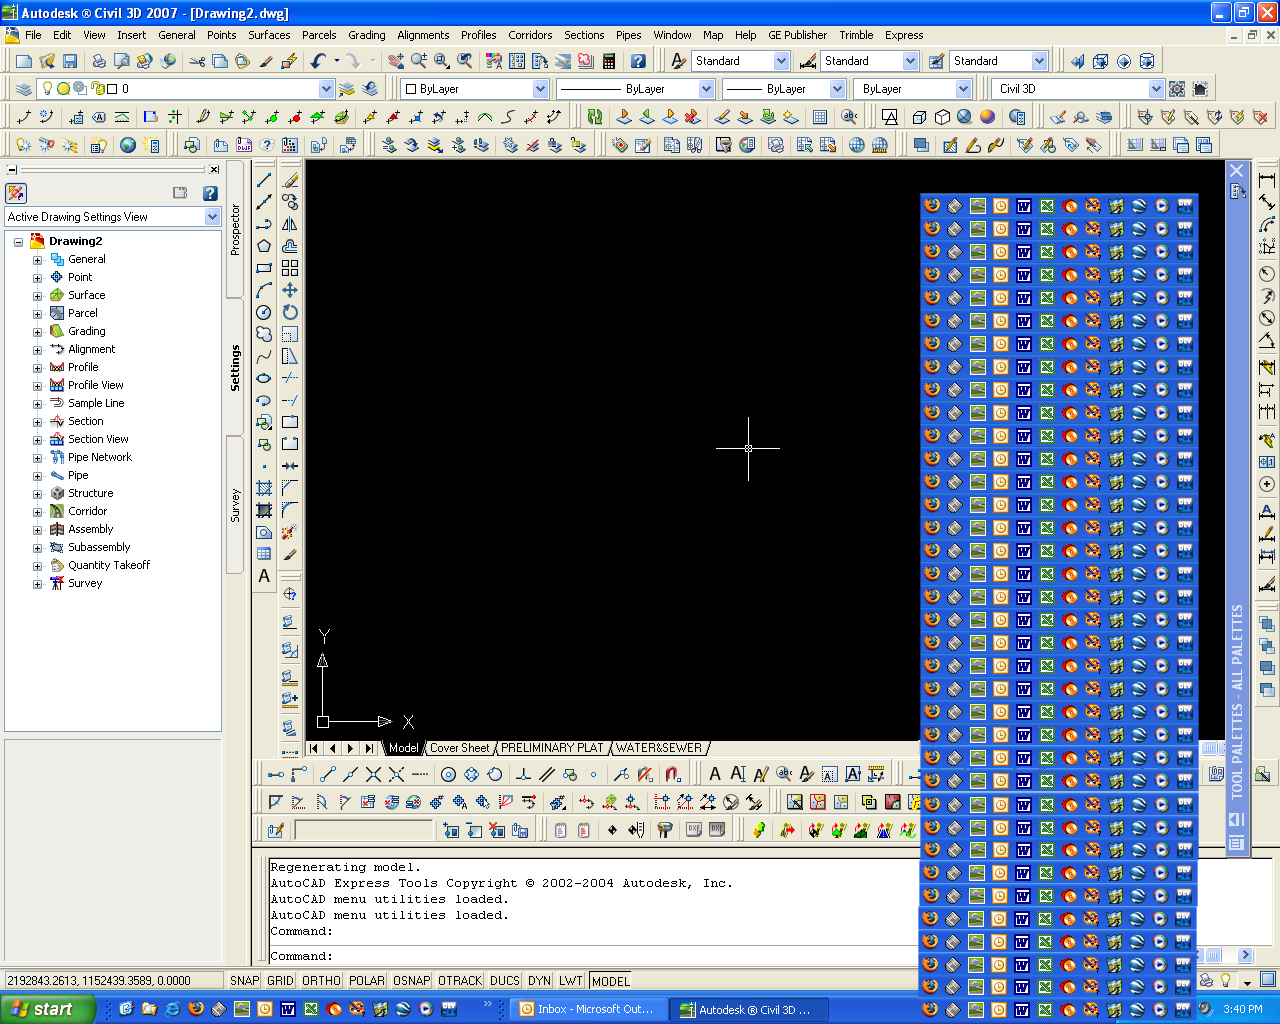
Do you ever wonder, "Why is my PC soooo terribly slow?" Why do I have so many icons that appear at the bottom right of my PC? (near the clock) Do I actually need those icons that I never click on?


This picutre is a bit over exaggerated but I think it serves a great purpose.


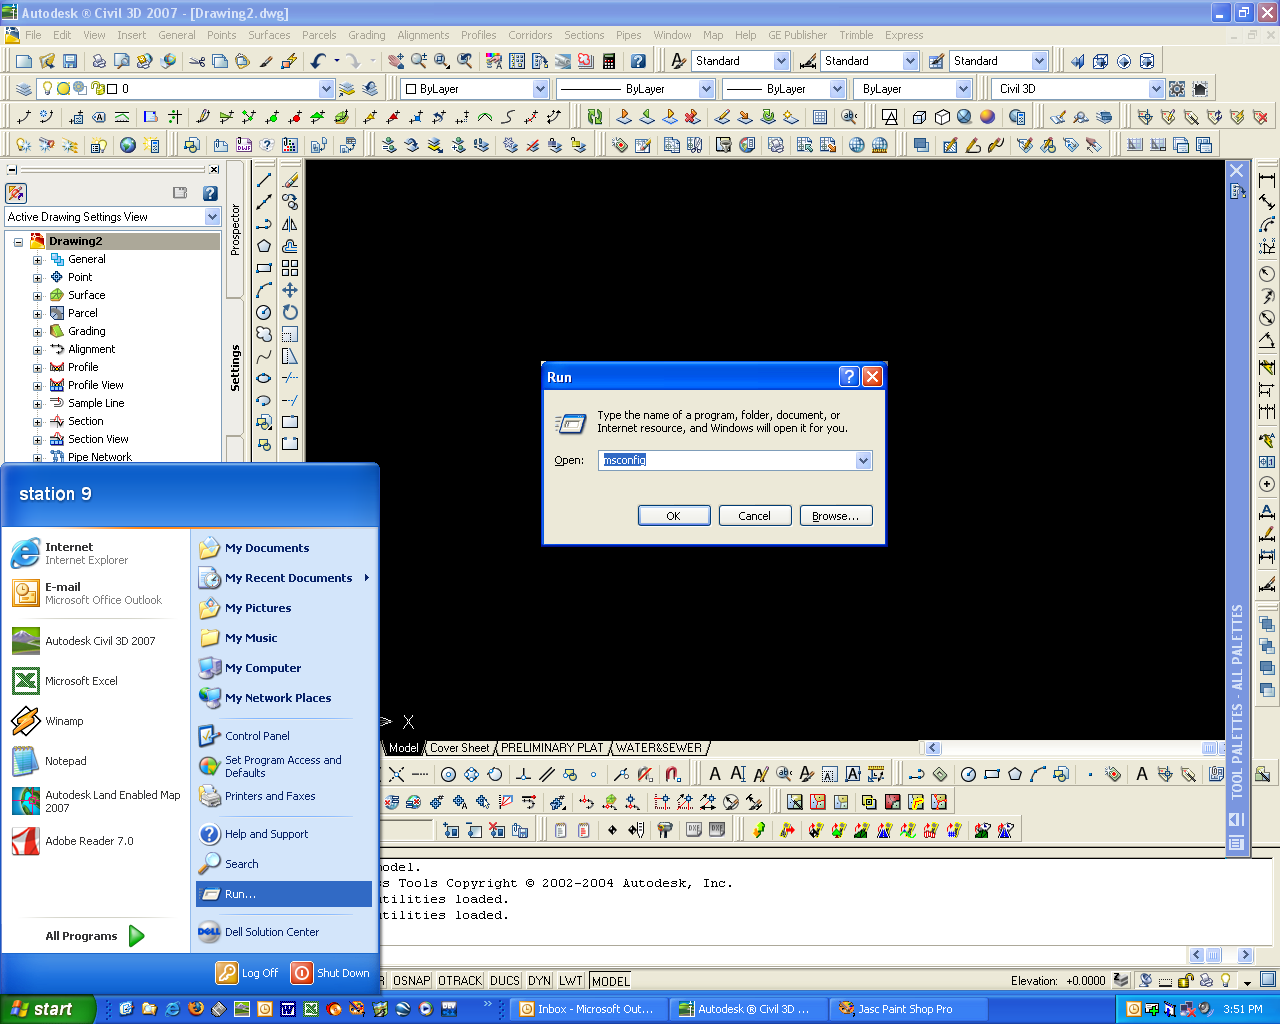
Click on "Start", then click "Run".

Next, type "msconfig" into the box and click "OK".

******************************************************************

BIG HUGE WARNING SIREN GOES OFF HERE.........Use at your own risk!!!!!!!!!!!!!!

Disclaimer: I am in no way responsible for your changing any settings!! :-)

Only click on the "Startup" tab, & NOTHING ELSE! If you mess with the "BOOT.INI", "SYSTEM.INI", "WIN.INI", etc... and start changing settings, there's a good posibility that your PC will not turn on, and if it does, you won't be happy!!!

*******************************************************************

Anyway, lets continue...

You want to click "Disable All", then click "OK"

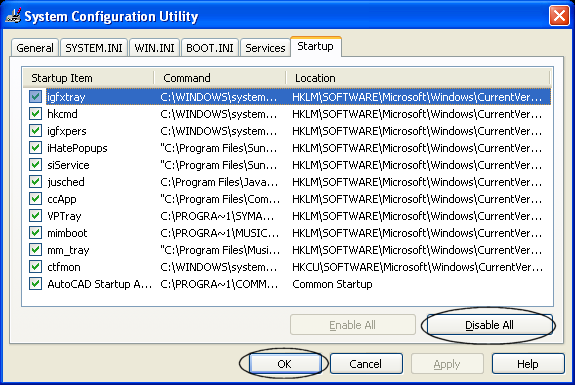
Once you click "OK", a box will appear asking for a Reboot. Once you reboot your PC, if you were bogged down with icons hogging your RAM, you will notice an increase in speed & efficiency!
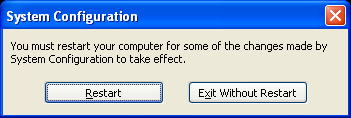
Since we need the RAM (free and clear) for our huge programs to run smoothly, this will for sure increase your productivity!

Enjoy!

Thursday, July 13, 2006

PC - Installing RAM Properly

Since I have decided to implement Civil 3D & Computer Tech. information on this blog, I will start with the very basic of the basics. The easiest of the easy! More times than not, people have moderately difficult times with installing RAM. Now, if you've ever installed RAM successfully, you would say to yourself, "Wow, this is VERY easy, a small child could do it!"

So this post is for the RAM Illiterate & disregard if you already obtain this Uber knowledge. This link has a great tutorial on how to install RAM correctly!

http://www.pcmech.com/show/memory/87/

Wednesday, July 12, 2006

Point Group - "No Points"

Today's topic covers the illusive "No Points" Point Group. With this group in the mix you can easily manipulate / show / not show various groups of points. It all depends on the order of where "No Points" group resides. Start by right clicking on "Point Groups". Create a new group called "No Points".

*Remember at any time you can click on the image to get a larger view!*


Once you have the Point Group created & set up properly, you can shift the order in which groups appear on the screen. Right click on Point Groups and click on Properties.


Then you can select the "No Points" group and with the arrows to the right, shift the "No Points" group to the very top. This will clear the screen of all points. To see certain groups, just select that group and move it above the "No Points" group within this Dialog box.

Enjoy!

Tuesday, July 11, 2006

Cross Section Labeling

Civil 3D comes with an array of label styles to modify *out of the box* and gets you pretty close to what you need. Once you have the section views in place it becomes quite simple to add & modify labels.

*Remember that you can always click on any picture to enlarge!*


1.) Firstly, click "Sections" --> "Add Section View Lables"


2.) In this box under "Label Type" you will able to choose whether you want to label slope, offset & elevations, etc... Then you can choose the label style that you would like to use.


3.) I would suggest creating a copy of the existing label styles and modify them to your needs.


4.) Now at this stage I wanted to create 2 label sets (i.e. one for the bottom & one for the top) I will choose to have the labels vertical off of the bends and anchors.

Let's start with the Bottom labeling...


You can choose to use a line, leader or just have elevations and offsets show up. I chose to have a line point to where the elevation stems from.


5.) I'm not going in any detail on the settings. I'm just posting screen shots of the final settings that I composed. *If you have any questions please feel free to comment!*

Click "Add" on the Add Labels box *see above*, choose the section view, then choose the part of the cross section in which you want to label. Make sure that your "offset elevation label style" is set to "Bottom" or the one you just created.


6.) Finally, create a copy of this new style that you have made. Change the name to "Top" or something simple. For the line you will need to change the Angle from 90 degrees to 270 degrees and I didn't change anything on the text portion of the settings.

That's it! Pretty easy huh?

That concludes today's topic of "Cross Section Labeling - 101"


After the whole ordeal with the SP1 & Sp1a... I found this blog name very fitting! :-)